Example: Creating the application DevelopChooser
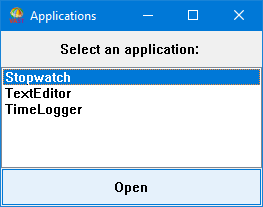
This example shows you how to create DevelopChooser, set its prerequisites, define its group members, and specify access privileges. When you are done with the examples in this part, opening an instance of DevelopChooser displays:


To create DevelopChooser:
1. Open an Application Manager. (Select Manage Applications from the Tools menu.)
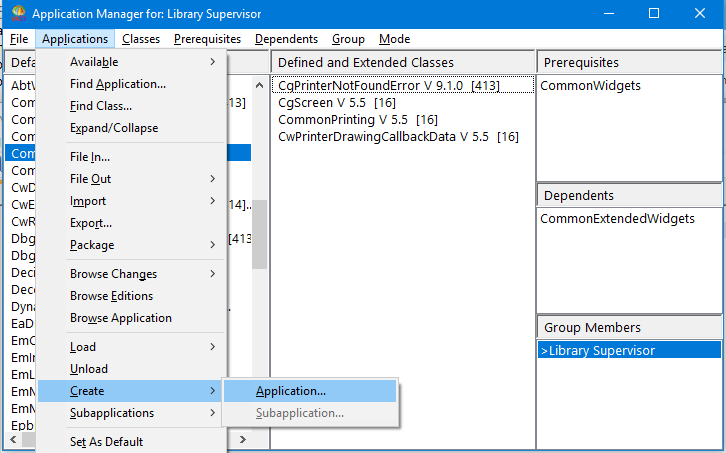
2. From the Applications menu, select Create > Application.


A window is displayed, prompting you to name the application.
3. Type DevelopChooser. If you share a library with team members who might also create DevelopChooser, you might want to add your initials as the first three characters of the application and class names. This will distinguish your components from other people's components.
4. Click on OK. A window is displayed, asking you to select prerequisites for your application.
5. For now, select the default, Kernel, which is already selected. To do this, click on OK.
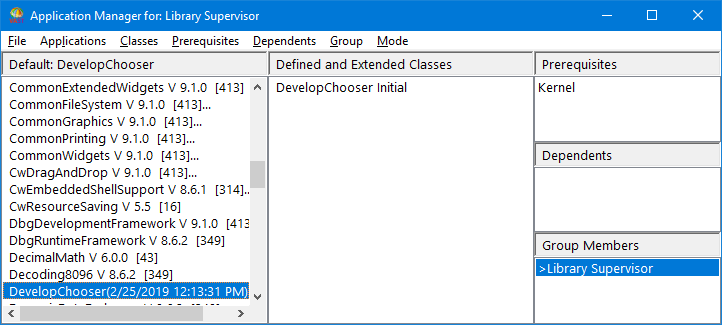
The Application Manager now displays the following:


Notice that after you create the application component several changes occur in the Application Manager:
•The list of applications now displays the name of your application with an edition timestamp next to it.
•Your application is now the default application.
•The list of classes has a new class called DevelopChooser with a version named Initial. This is the class name within the image that represents the application, and shares the same name. (You can browse the class from a Classes Browser.)
•The list of prerequisites now displays the application name Kernel.
•The list of group members displays your name. Because you created this application, you are by default its manager and have the greater-than sign (>) beside your name.
To complete DevelopChooser, you need to change the application prerequisites and then define classes and methods for your application.
Last modified date: 02/27/2019